When the craving for something cheesy and warm strikes, nothing beats the sheer delight of Pão de Queijo—Brazilian cheese bread. The first time I watched the dough bubble and puff up in the oven, I was captivated by the captivating aroma that filled my kitchen. The moment I broke one open, revealing its gooey, cheesy center, I knew I had found a recipe that would become a staple in my home.
These delightful, gluten-free bites are incredibly easy to whip up and impossible to resist. With a crispy exterior and a soft, chewy inside, they are the perfect snack for any occasion—from cozy evenings at home to parties with friends. Plus, they’re vegetarian, making them a hit for everyone at the table. Join me as I take you through the simple steps to create these irresistible Brazilian treats that will have you saying goodbye to fast food forever!
Why Is Brazilian Cheese Bread So Irresistible?
Delicious and oh-so-satisfying, Brazilian cheese bread is a treat unlike any other. Gluten-free and vegetarian, it welcomes everyone to the table. Quick to make, you can whip up a batch in no time, perfect for impromptu gatherings. Versatile, enjoy them as a snack, appetizer, or alongside your favorite soup. Once you experience that gooey cheese center and crispy exterior, you’ll find they disappear faster than you can bake them! For a delightful pairing, consider trying them with some homemade soup.
Brazilian Cheese Bread Ingredients
• Discover what makes this cheesy delight so irresistible!
For the Dough
- Whole Milk – Adds moisture and richness to the dough; for best results, use whole or 2% milk.
- Vegetable Oil – Provides fat for tenderness and a moist texture; can be replaced with melted butter for added flavor.
- Salt – Enhances the overall flavor of the cheese bread; sea salt or kosher salt works well as alternatives.
- Tapioca Flour – The key gluten-free ingredient that gives Pão de Queijo its unique chewy texture; essential for proper texture, so no substitutions allowed.
For the Cheese Blend
- Part-skim Mozzarella Cheese – Contributes to the gooey interior; can be mixed with other cheeses like Gouda or Monterey Jack.
- Cotija Cheese (or Alternatives) – Adds a salty, rich flavor; any finely shredded cheese can be used for variation.
For Binding
- Large Eggs – Binds the dough together, giving structure and moisture; eggs should be at room temperature for best mixing and texture.
With these ingredients in hand, you’re all set to create the delightful Brazilian cheese bread that’s sure to become a favorite!
How to Make Brazilian Cheese Bread
-
Preheat Oven: Begin by heating your oven to 350°F (175°C) and lining a baking pan with parchment paper. This step ensures even baking and that your cheese bread won’t stick!
-
Boil Mixture: In a large saucepan, bring the whole milk, vegetable oil, and salt to a boil over medium-high heat, whisking occasionally. You want to see soft bubbles forming for the next step.
-
Add Flour: Quickly stir in the tapioca flour until the mixture becomes gummy and gelatinous, resembling a sticky dough. This crucial step creates the base for your delightful texture!
-
Beat Dough: Carefully transfer the dough to a stand mixer fitted with a paddle attachment. Mix on low, then gradually increase to medium for 2-3 minutes until smooth and well combined.
-
Incorporate Cheese and Eggs: Gradually add both grated cheeses and mix well. One at a time, add the eggs, beating until a stretchy, cohesive dough forms that hints at all that cheesy goodness inside.
-
Portion and Scoop: Using an ice cream scoop dipped in water (this helps prevent sticking!), create portions of the dough and place them evenly on the prepared baking sheet.
-
Bake: Pop the tray into your preheated oven and bake for 25-30 minutes until the tops are golden brown and crisp. They may appear slightly greasy, but they’ll firm up as they cool.
-
Cool: Let your Pão de Queijo cool on the baking sheet for a few minutes before digging in. This waiting time is essential for that perfect texture.
Optional: Serve with a side of spicy salsa for an extra kick!
Exact quantities are listed in the recipe card below.
Make Ahead Options
Pão de Queijo is ideal for busy home cooks looking to save time in the kitchen! You can prepare the dough up to 24 hours in advance. After mixing all ingredients and portioning the dough onto the baking sheet, simply cover it with plastic wrap and refrigerate. When you’re ready to enjoy these delightful Brazilian cheese bread bites, pop them straight into a preheated oven without thawing for a slightly longer baking time of 30-35 minutes. This method not only preserves their texture and flavor but also means you can have fresh, warm Pão de Queijo ready at a moment’s notice, making your meal planning easier than ever!
How to Store and Freeze Brazilian Cheese Bread
-
Room Temperature: Store leftover Brazilian cheese bread in an airtight container for up to 2 days. This keeps them fresh and tasty, perfect for snacking throughout the day.
-
Fridge: If you have extra Pão de Queijo, place them in the refrigerator for up to 5 days. Just ensure they’re in an airtight container to prevent them from drying out.
-
Freezer: For longer storage, freeze unbaked dough balls by placing them on a baking sheet until firm, then transfer to a resealable freezer bag for up to 3 months.
-
Reheating: When you’re ready to enjoy frozen Pão de Queijo, bake straight from the freezer at 350°F (175°C) for about 25-30 minutes until golden and crispy. Enjoy the cheesy goodness!
Expert Tips for Perfect Brazilian Cheese Bread
- Use Fresh Ingredients: Ensure your cheeses and eggs are fresh for the best flavor and texture in your Brazilian cheese bread.
- Room Temperature Eggs: Always use eggs at room temperature to help emulsify the dough and create that lovely, stretchy consistency.
- Monitor Baking Time: Keep an eye on the bread while baking; overbaking can lead to dryness while the perfect bake ensures a soft, gooey center.
- Avoid Substitutions: Stick with tapioca flour; any substitutions can alter the texture, leading to disappointing results.
- Experiment with Cheese: Don’t hesitate to mix different cheeses like cheddar for a unique flavor profile, enhancing your Brazilian cheese bread experience.
What to Serve with Pão de Queijo?
Elevate your Pão de Queijo experience by pairing these delightful cheese puffs with complementary flavors and textures that enhance any meal.
- Hearty Tomato Soup: The tangy acidity and warmth of tomato soup create a comforting duo, perfect for dipping.
- Fresh Green Salad: A crisp salad with light vinaigrette adds a refreshing contrast to the rich, cheesy bread.
- Savory Guacamole: The creamy texture and bold flavors of guacamole make for an irresistible dip alongside your cheese bread.
- Coconut Chutney: This sweet-spicy condiment introduces a tropical flair that balances the cheesiness of Pão de Queijo. Who could resist that?
- Spicy Salsa: Pairing with a zesty salsa gives a punchy kick, creating a delightful explosion of bold flavors in every bite.
- Crunchy Pickles: The tang and crunch of pickles offers a delightful contrast, making each cheese puff even more satisfying.
- Herbed Quinoa: Lightly seasoned quinoa adds nourishing whole grains to your meal, perfectly complementing the indulgence of Pão de Queijo.
- Chilled White Wine: A crisp, chilled wine enhances the flavors and adds a touch of elegance to your table.
Brazilian Cheese Bread Variations
Feel free to get creative and make this recipe your own by experimenting with these fun twists!
-
Herb Infusion: Add a tablespoon of your favorite fresh herbs, like rosemary or thyme, for a fragrant, earthy note.
-
Cheese Swap: Substitute mozzarella with sharp cheddar or creamy goat cheese for an unexpected flavor profile.
-
Spicy Flair: Blend in finely chopped jalapeños or a dash of cayenne pepper for a delightful heat that complements the cheese.
-
Sweet Touch: Incorporate a tablespoon of honey or maple syrup into the dough for a hint of sweetness that pairs beautifully with cheese.
-
Nutty Flavor: Mix in toasted sesame seeds or poppy seeds for added crunch and a unique layer of flavor.
-
Smoky Essence: Add a pinch of smoked paprika or even crumbled bacon for a smoky twist that elevates the overall taste.
-
Veggie Boost: Fold in finely grated zucchini or spinach to sneak more nutrition into these cheesy bites while keeping them tender.
-
Gourmet Cheese Blend: Experiment with a combination of cheeses, such as Gruyère and Parmesan, for a rich, decadent flavor experience that’ll impress anyone you serve.
Pão de Queijo Recipe FAQs
What type of cheese is best for Pão de Queijo?
Absolutely! Part-skim mozzarella is a classic choice for Pão de Queijo, contributing to that irresistible gooey interior. You can also mix in other cheeses like Gouda or Monterey Jack for added flavor. For a more traditional taste, Cotija cheese gives a nice salty essence, but feel free to experiment with your favorite finely shredded cheeses!
How do I store leftover Pão de Queijo?
Leftover Pão de Queijo can be stored at room temperature in an airtight container for up to 2 days. If you want them to last longer, place them in the fridge, where they can stay fresh for up to 5 days. Just ensure they’re well-sealed to maintain moisture.
Can I freeze Pão de Queijo?
Very! To freeze unbaked Pão de Queijo, first portion the dough onto a baking sheet lined with parchment paper and place it in the freezer until firm, about 1-2 hours. Once they’re solid, transfer them to a resealable freezer bag, and they can stay frozen for up to 3 months. When you’re ready to bake, simply pop them in the oven straight from the freezer at 350°F (175°C) for 25-30 minutes until golden.
Why did my Pão de Queijo turn out flat?
If your Pão de Queijo is flat, it might be due to under-mixing or not using enough tapioca flour. Ensure you’re mixing until the dough is smooth and stretchy. Also, check that you’re using the correct proportions; even a slight deviation can affect the texture. Remember, tapioca flour is crucial for that wonderfully chewy quality, so avoid substitutes!
Are Pão de Queijo safe for people with gluten sensitivities?
Absolutely! Pão de Queijo is naturally gluten-free as it uses tapioca flour instead of wheat flour, making it a great option for those with gluten sensitivities or celiac disease. However, always double-check that your ingredients, especially processed cheese, are certified gluten-free to avoid any cross-contamination.
Can I use alternative milks in this recipe?
Certainly! For a dairy-free option, you can substitute whole milk with almond milk or coconut milk. Just make sure to choose unsweetened varieties to keep the taste balanced. However, creamy options like oat milk might yield a richer flavor that complements the cheese beautifully. Just ensure whatever milk you use has a similar consistency to whole milk for best results.
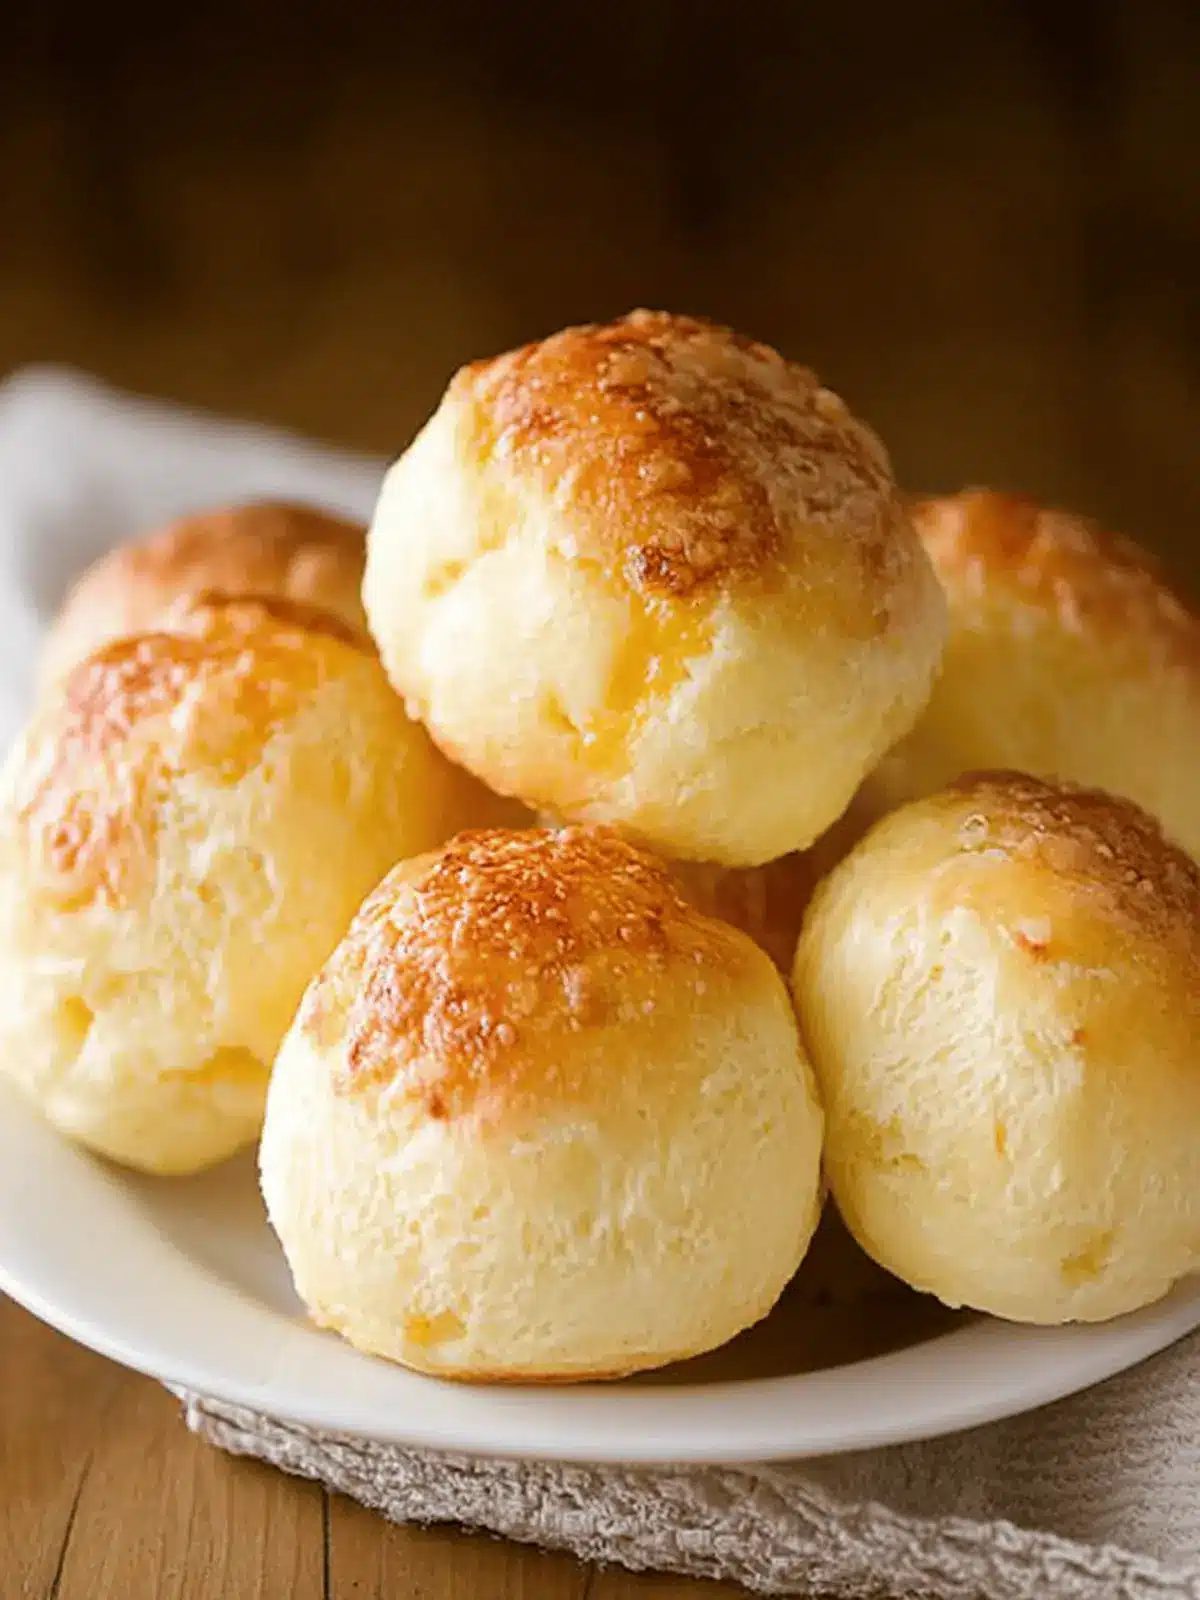
Delicious Brazilian Cheese Bread: Your New Favorite Snack
Ingredients
Equipment
Method
- Preheat your oven to 350°F (175°C) and line a baking pan with parchment paper.
- In a large saucepan, bring the whole milk, vegetable oil, and salt to a boil over medium-high heat, whisking occasionally.
- Quickly stir in the tapioca flour until the mixture becomes gummy and gelatinous.
- Transfer the dough to a stand mixer fitted with a paddle attachment. Mix on low, then increase to medium for 2-3 minutes until smooth.
- Gradually add the grated cheeses and mix well. One at a time, add the eggs, beating until a stretchy dough forms.
- Using an ice cream scoop dipped in water, create portions of the dough and place them evenly on the prepared baking sheet.
- Bake for 25-30 minutes until golden brown and crisp.
- Let the Pão de Queijo cool on the baking sheet for a few minutes before serving.

